一、Word生成
1. 引入依赖
<dependency>
    <groupId>cn.afterturn</groupId>
    <artifactId>easypoi-base</artifactId>
    <version>4.1.0</version>
</dependency>
<!--如果需要同时引入easypoi和poi需要注意版本问题,4.1.0版本的easypoi和高版本的poi同时使用会导致word表格内容生成异常,所以可以搭配4.1.2版本的poi使用-->
<dependency>
    <groupId>org.apache.poi</groupId>
    <artifactId>poi</artifactId>
    <version>4.1.2</version>
</dependency>
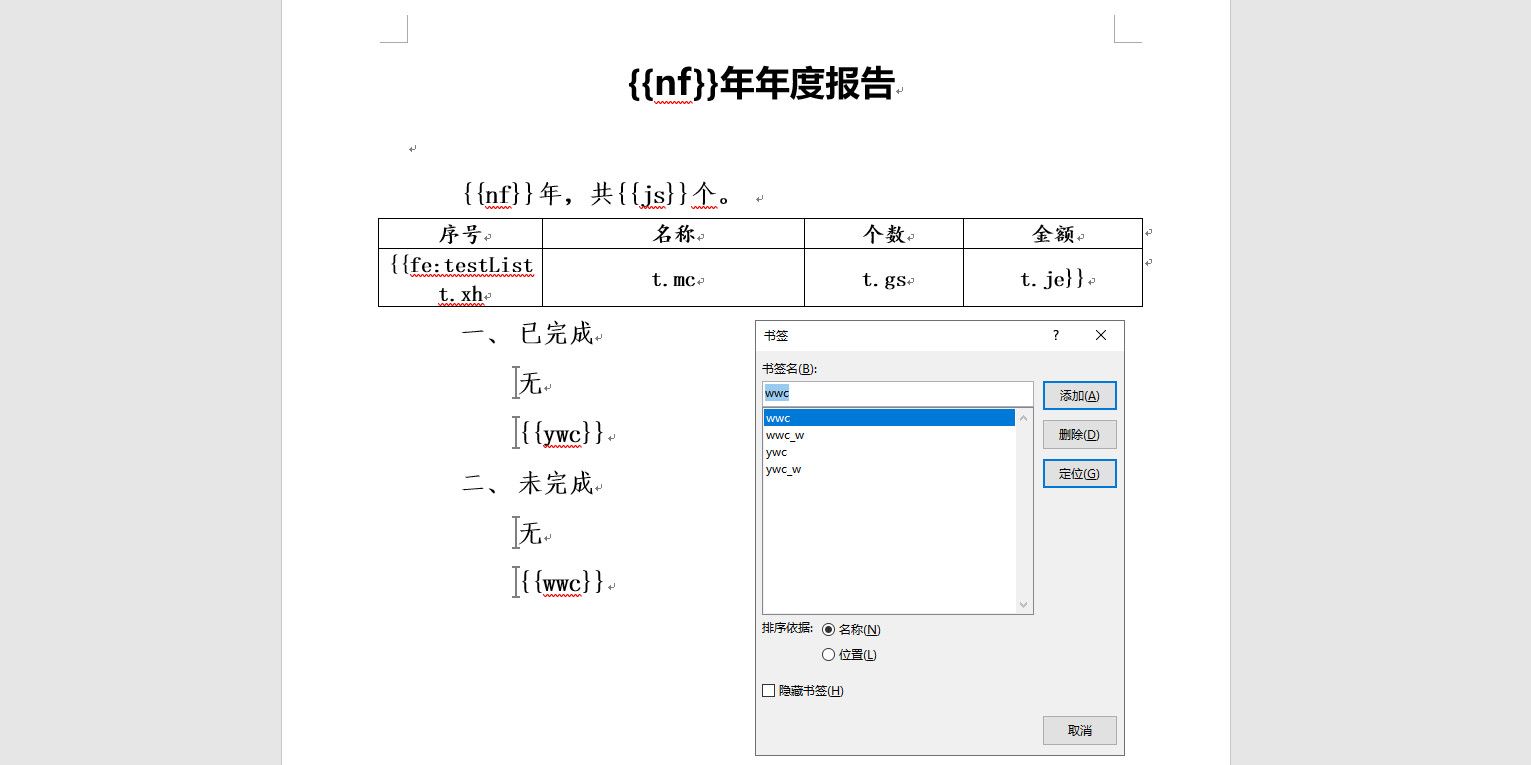
2. 创建word模板
3. 创建实体类
@Getter
@Setter
public class TestBg {
    private String nf;
    private String gs;
    private List<NodeList> testList;
    private String ywc;
    private String wwc;
}

@Setter
@Getter
public class NodeList {
    private String xh;
    private String mc;
    private String gs;
    private String je;
}
4. easypoi标签替换
public void testMethod(HttpServletResponse response, String year) throws Exception {
    // 构造数据
    TestBg bg = buildData(year);
    // 数据转map
    Map<String, Object> map = BeanUtil.beanToMap(bg, new HashMap<>(), false, false);
    // 设置下载文件名
    response.setHeader("Content-Disposition", "attachment;filename=" + URLEncoder.encode("年度报告(" + year + ").docx", "UTF-8"));
    try(OutputStream baos = response.getOutputStream()) {
        // 获取模板
        InputStream inputStream = XbascBaService.class.getClassLoader().getResourceAsStream("template/年度报告模板.docx");
        XWPFDocument xwpfDocument = new MyXWPFDocument(inputStream);
        // 替换文本数据
        WordExportUtil.exportWord07(xwpfDocument, map);

        // 特殊处理 - 如果已完成、未完成为空显示“无”,否则删除“无”
        fileContentDeal(bg, xwpfDocument);
		// 写入输出流,下载
        xwpfDocument.write(baos);
    }
}
5. 特殊处理,poi对段落进行删除
/**
 * 删除段落
 * @param document 文档
 * @param startBookmark 删除起始书签名称
 * @param offset (除书签段落本身)额外删除段落数
 */
private void deleteParagraph(XWPFDocument document, String startBookmark, int offset){
    List<IBodyElement> bodyElements = document.getBodyElements();
    int start = 0;
    for (IBodyElement bodyElement: bodyElements) {
        List<CTBookmark> bookmarkStartList = null;
        if(bodyElement instanceof XWPFParagraph) {
            bookmarkStartList = ((XWPFParagraph) bodyElement).getCTP().getBookmarkStartList();
            for (CTBookmark bookmark : bookmarkStartList) {
                if (StringUtils.equals(bookmark.getName(), startBookmark)) {
                    start = bodyElements.indexOf(bodyElement);
                    break;
                }
            }
        }
    }
    for (int i = start + offset; i >= start; i--) {
        document.removeBodyElement(i);
    }
}

private void fileContentDeal(TestBg bg, XWPFDocument document) {
    if(StringUtils.isBlank(bg.getYwc())){
        deleteParagraph(document, "ywc", 0);
    } else {
        deleteParagraph(document, "ywc_w", 0);
    }
    if(StringUtils.isBlank(bg.getWwc())){
        deleteParagraph(document, "wwc", 0);
    } else {
        deleteParagraph(document, "wwc_w", 0);
    }
}
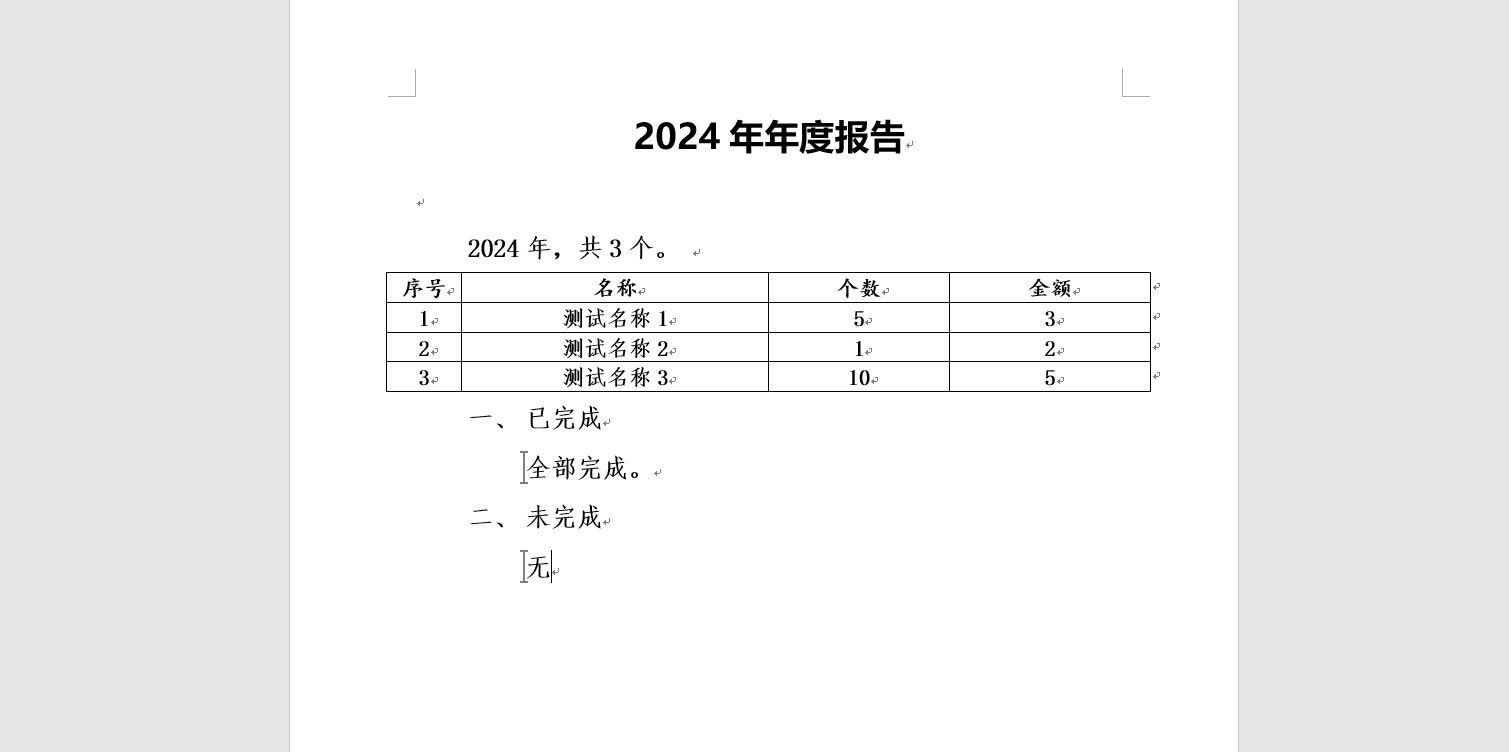
6. 生成Word
二、Excel生成
1. 引入依赖
<dependency>
    <groupId>cn.afterturn</groupId>
    <artifactId>easypoi-base</artifactId>
    <version>4.1.0</version>
</dependency>
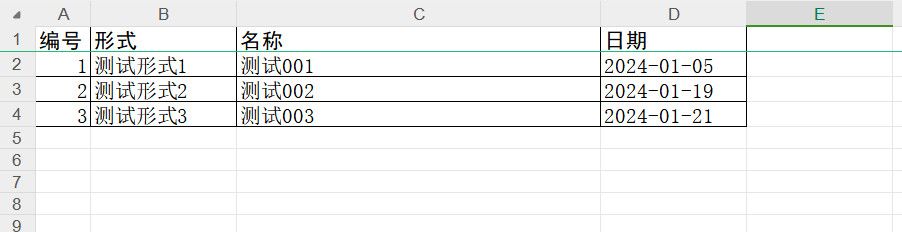
2. 创建实体
name为列头名称,orderNum为列顺序,width为列宽。
@Getter
@Setter
public class ExcelVO {
    @Excel(name = "编号", orderNum = "0", width = 6)
    private String bh;
    @Excel(name = "形式", orderNum = "1", width = 16)
    private String xs;
    @Excel(name = "名称", orderNum = "2", width = 40)
    private String mc;
    @Excel(name = "日期", orderNum = "4", width = 16)
    private String rq;
}
3. easypoi生成
public void exportBaxxb(HttpServletResponse response, String year) throws Exception {
    // 构造数据
    List<ExcelVO> ExcelVOS = buildData(year);
    // 设置下载文件名
    response.setHeader("Content-Disposition", "attachment;filename=" + URLEncoder.encode("信息表(" + year + ").xlsx", "UTF-8"));
    try(OutputStream baos = response.getOutputStream()) {
        // 使用上面构造的数据生成Excel,并设置sheet页名称
        Workbook workbook = ExcelExportUtil.exportExcel(new ExportParams(null, "信息表(" + year + ")"), BaxxbExcelVO.class, ExcelVOS);
        // 构造标题字体样式
        CellStyle titleCellStyle = getCellStyle(workbook, "黑体");
        // 构造正文字体样式
        CellStyle contentCellStyle = getCellStyle(workbook, "仿宋_GB2312");
        // 循环给每个单元格设置字体样式
        boolean firstRow = true;
        for (Row row: workbook.getSheetAt(0)){
            //自动换行
            row.setHeightInPoints((short)-1);
            for (Cell cell: row) {
                cell.setCellStyle(firstRow ? titleCellStyle : contentCellStyle);
            }
            firstRow = false;
        }
        // 文件写入输出流,下载
        workbook.write(baos);
    } catch (Exception e){
        log.error("生成Excel信息表异常!", e);
    }
}

private CellStyle getCellStyle(Workbook workbook, String fontName){
    // 边框
    CellStyle cellStyle = workbook.createCellStyle();
    cellStyle.setBorderTop(BorderStyle.THIN);
    cellStyle.setBorderBottom(BorderStyle.THIN);
    cellStyle.setBorderLeft(BorderStyle.THIN);
    cellStyle.setBorderRight(BorderStyle.THIN);
    // 字体
    Font font = workbook.createFont();
    font.setFontName(fontName);
    font.setFontHeightInPoints((short) 12);
    cellStyle.setFont(font);
    // 自动换行
    cellStyle.setWrapText(true);
    return cellStyle;
}
4. 生成Excel